

Armorpoxy Flake Visualizer tool is designed to help the users visualize how different flake or color combinations will look on their flooring projects. This tool is particularly useful for customers choosing the colors schemes and flake patterns for epoxy flooring systems.
Here in this blog, we will explore step by step guide on how to use Armorpoxy Flake Visualizer tool at your ease.
Step by step Guide on using Flake Visualizer Tool
1: Access the tool
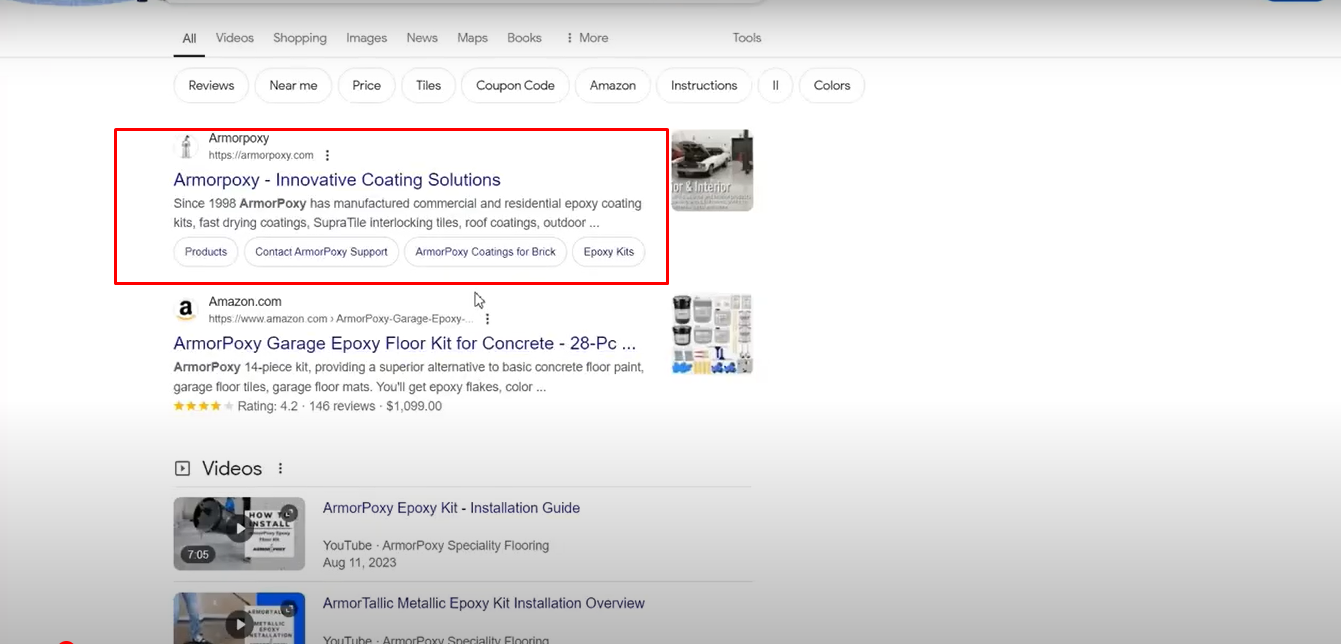
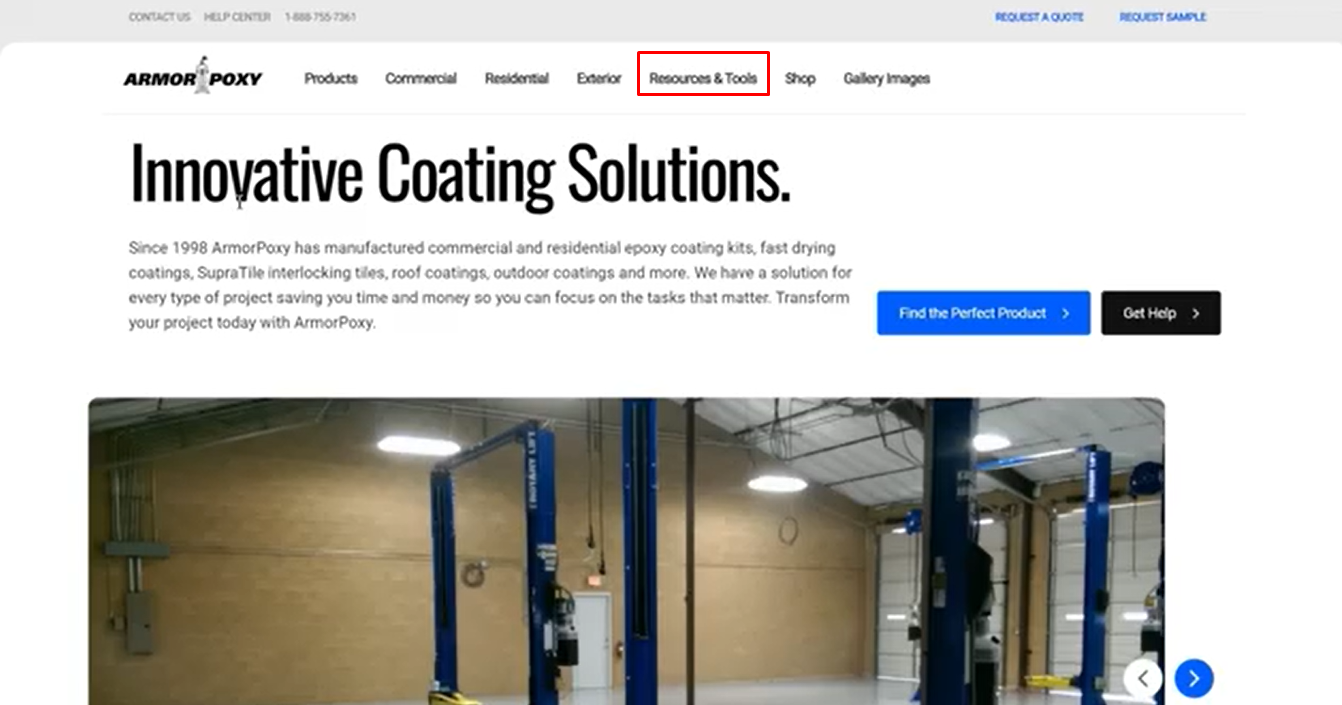
a. Visit Armorpoxy official website.
b. Once the website is open, go to Resource and Tool section.
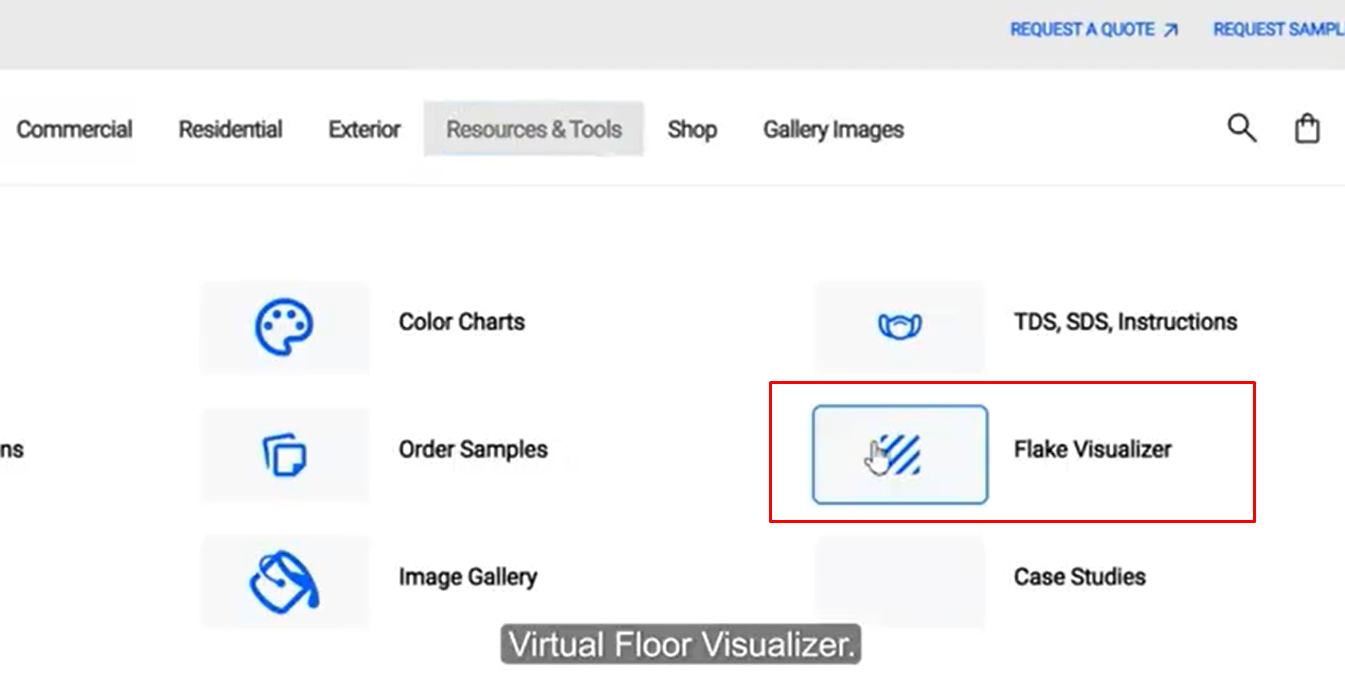
2: Flake Visualizer: Interface and usage
a. Once you click on the flake visualizer, you will see the interface here color options and environments are displayed.
b. For flooring visualizing, you need to select the color from color section according to your preferences.
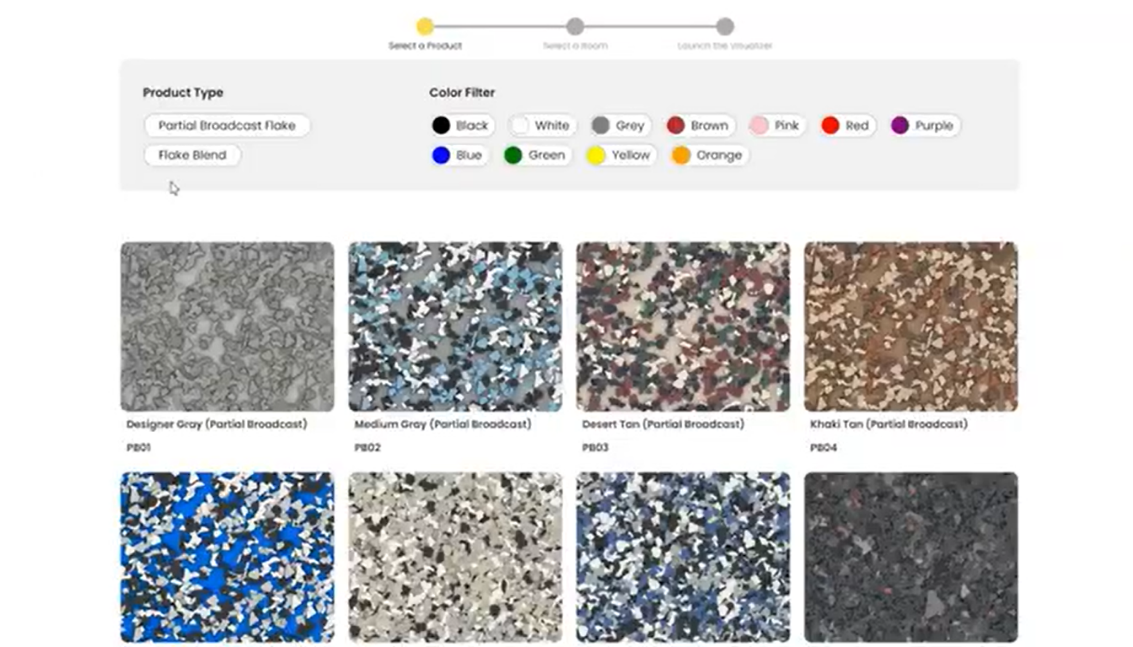
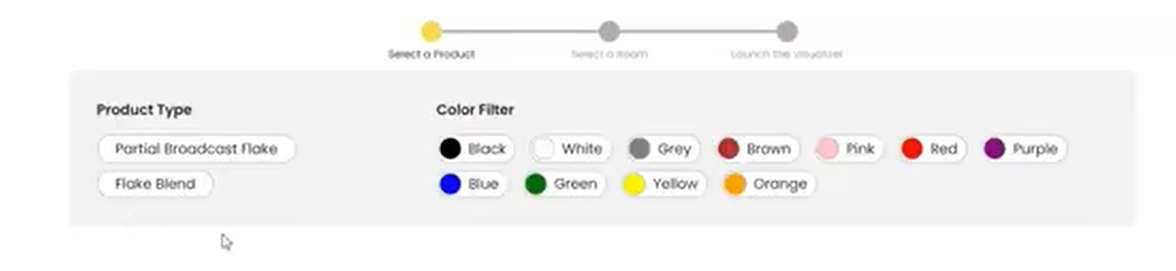
c. Next step is to select the texture from texture section

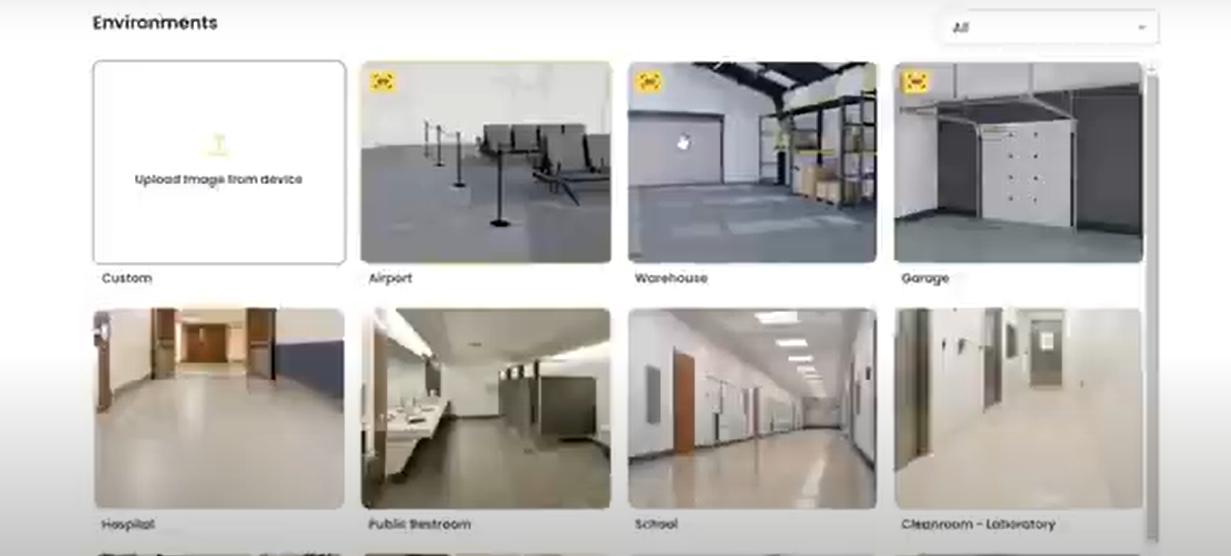
d. Flake Visualizer give you environment options in standard and 3D options as well. Select the type of environment you’re planning to apply the flooring to. Common options might include garages, basements, industrial spaces, or commercial areas. The visualizer will adjust the background to match the selected environment
3: Customize your Environment
a. Once you have selected your environment, you can customize it according to your preference. You can even upload an environment from your gallery as well.
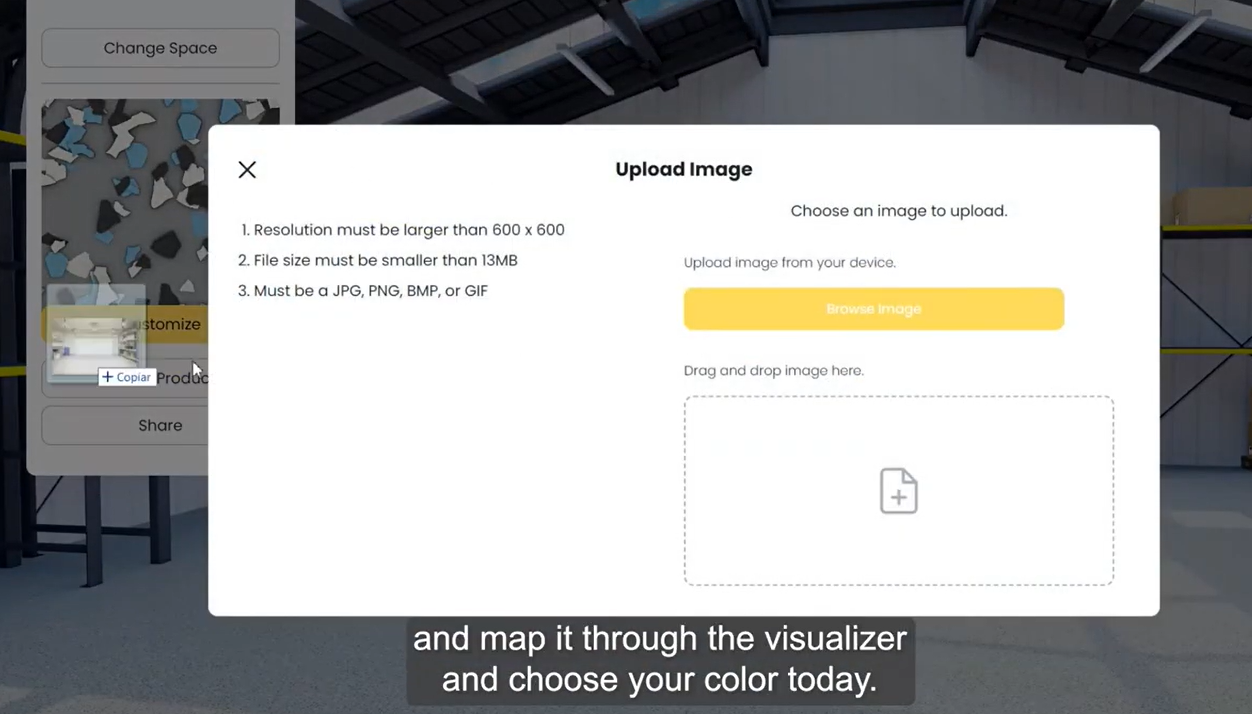
b. Once you are satisfied with your flooring environment, the interface will look similar to the below image. From this interface, you can customize the environment in standard and 3D as well depending on your need.

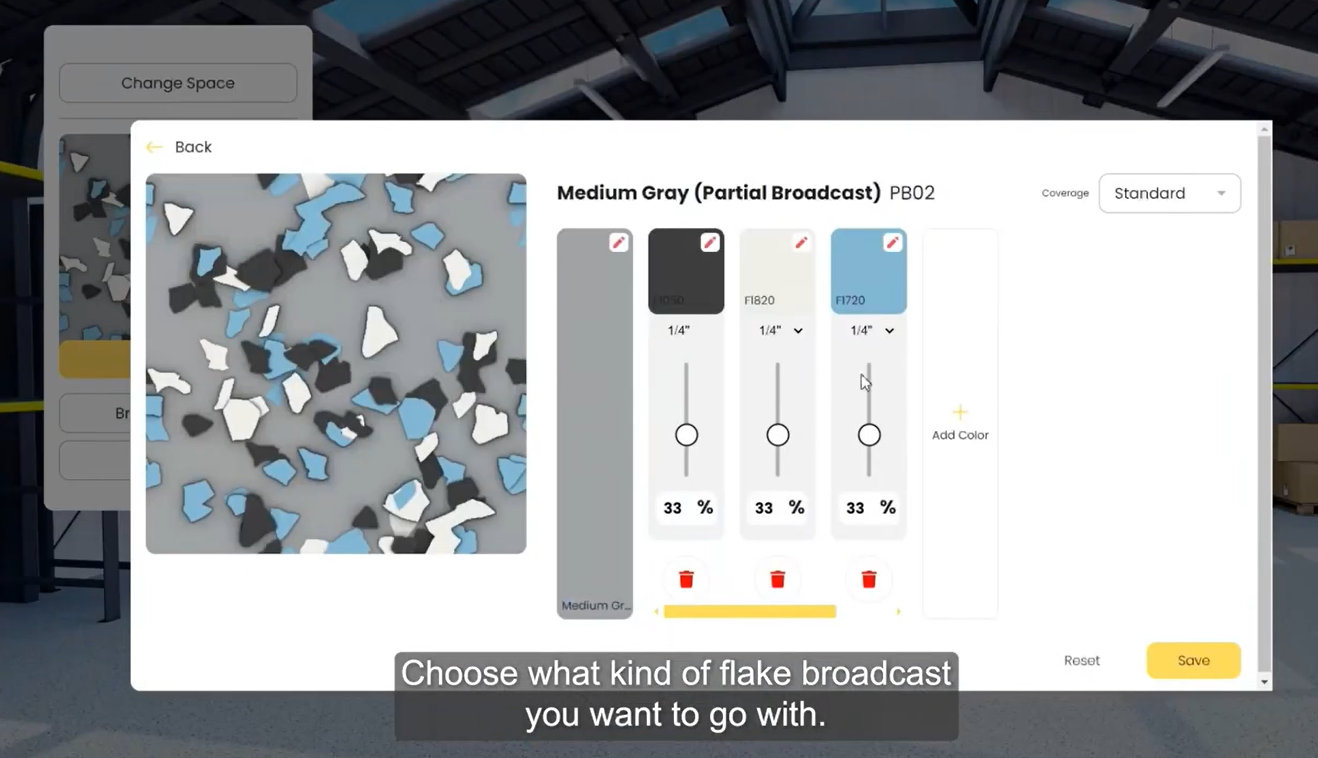
c. From the side menu, you can navigate and customize the flooring options. Click on the browse products and you can select the Flake pattern and flake density. The dropdown section will have “Standard” “Heavy” and “Full” options to select. You can also select the partial density of flake from this section as well.
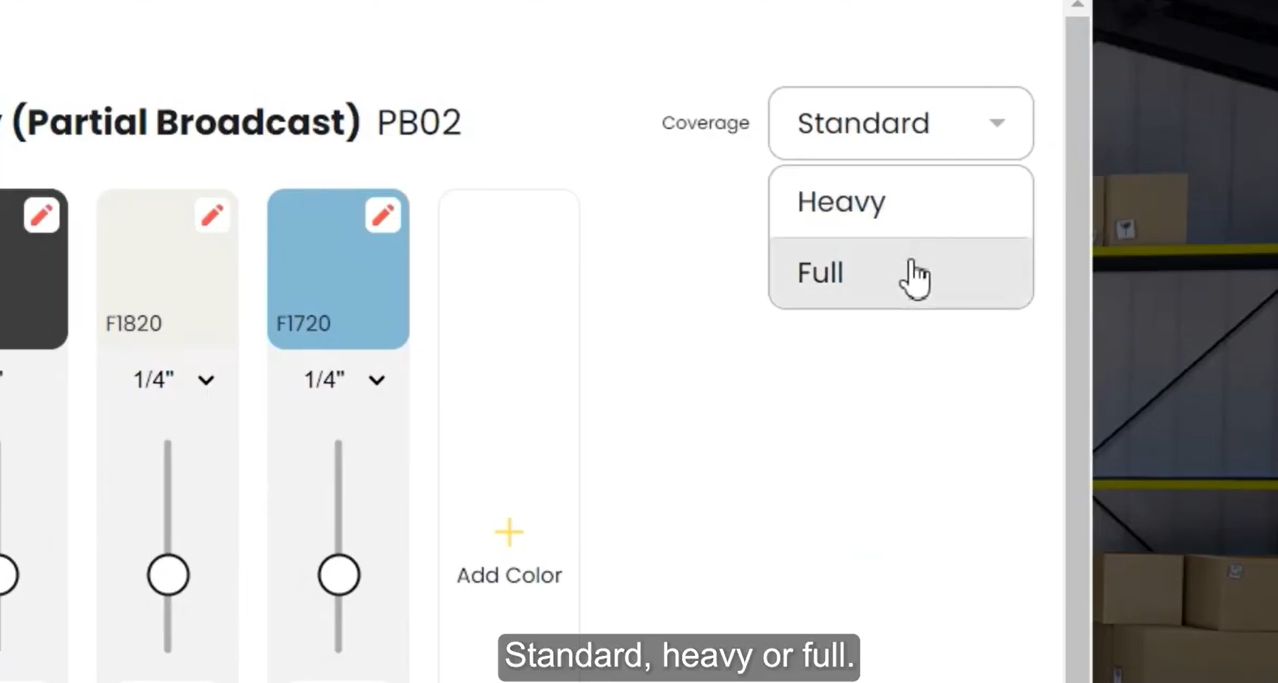
d. Once your flake density is selected, you can also choose the base color and partial broadcast on the flake flooring. It is really that easy to use and navigate the customization.
4: Preview the Flooring:
a. After selecting your colors and density, the visualizer will display a preview of how your choices will look in the chosen environment. You can often rotate the view or zoom in to get a closer look at the texture and color interplay.
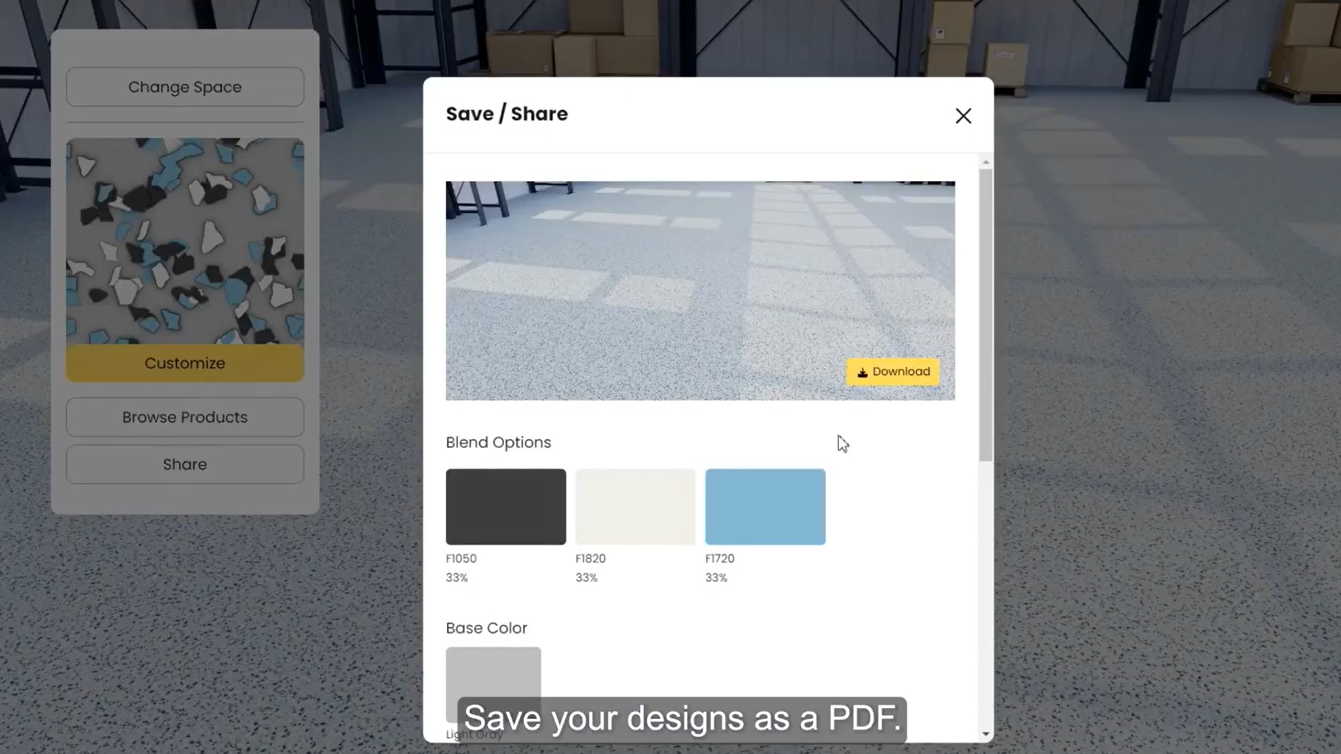
5: Save or Share Your Design:
a. Once satisfied with your design, you can usually save the configuration or share it with others. This is useful for presenting to clients or getting approvals before starting the project. You will get the option of either saving the design or share it with your family.
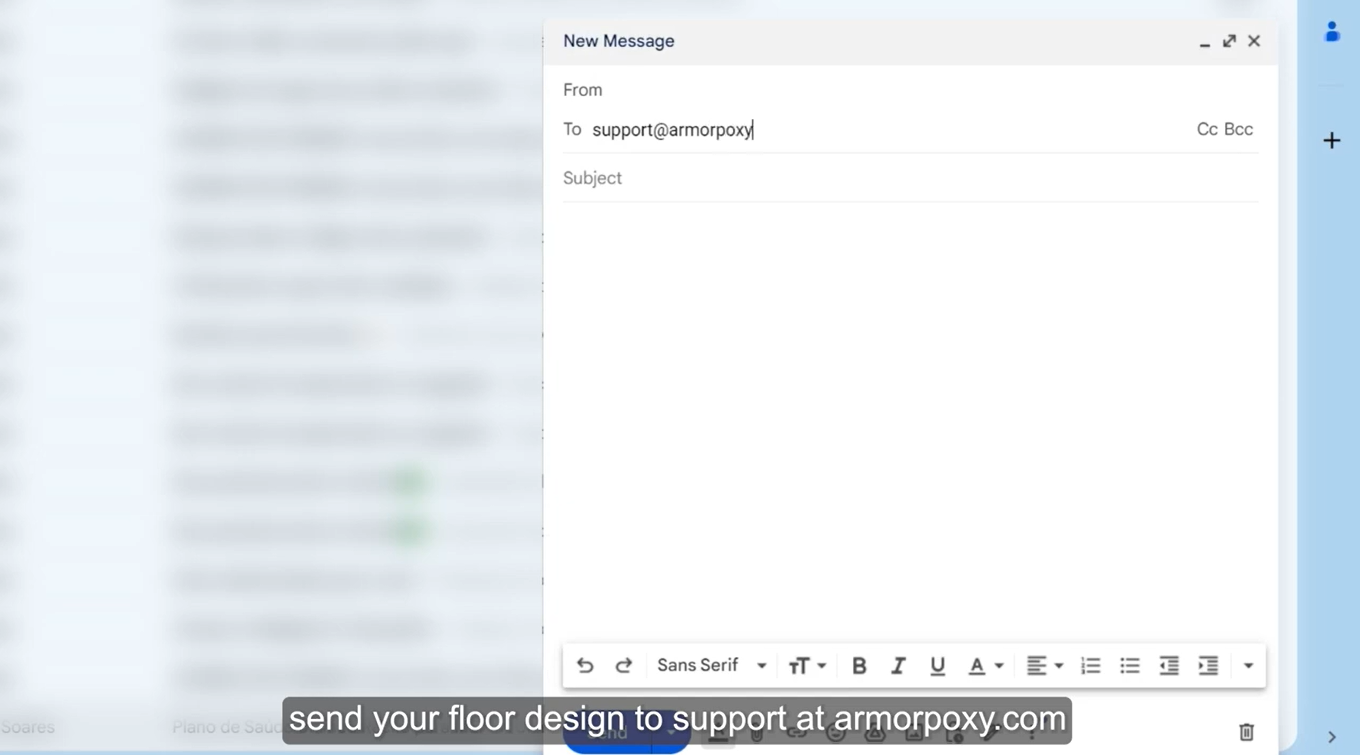
6: Email the design to Armorpoxy Support
a. The best part of the Flake Visualizer is that once you are happy with your design and customization, you can directly email the design to Armorpoxy at support@armorpoxy.com.
7: Unlimited options.
Flake Visualizer is the ultimate tool from Armorpoxy. It shows unlimited options regarding color and flake pattern. You can order the specific flakes, base colors, and other materials directly based on your design.
Tips for Using the Flake Visualizer
1. Experiment with Different Combinations: Don’t hesitate to try various flake combinations to see what looks best for your space.
2. Consider Lighting: The appearance of the flakes may vary depending on the lighting in the actual environment versus the visualizer.
3. Consult with a Professional: If unsure about your choices, consulting with an Armorpoxy professional can provide additional insights and recommendations.
This guide should help you navigate the Flake Visualizer tool effectively, ensuring that you select the best possible options for your flooring project