The ArmorPoxy Fast Set Epoxy Patch Kit is a 3 component kit of special fast curing A& B resin and aggregate. All three components get mix together to form a mortar that gets applied to fill cracks, holes or any other concrete irregularity.
Here is a breakdown of the ArmorPoxy Fast Epoxy Patch Kit process
Tools required
These tools are effectively use a Fast Set Epoxy Patch Kit, you'll need the following tools:
- Wire Brush or Grinder: To clean and roughen the surface for better adhesion.
- Trowel or Putty Knife: For applying and smoothing the epoxy mixture over the damaged area.
- Mixing Container: To combine the resin and hardener.
- Stir Stick: For mixing the epoxy components thoroughly.
- Gloves and Safety Gear: To protect your hands and eyes while working with epoxy.
These tools ensure proper application and safety during the process.
Application Process
Here’s a more detailed guide on using a Fast Set Epoxy Patch Kit:
1. Surface Preparation:
Thoroughly clean the area to remove any dust, grease, or loose debris. Use a wire brush or grinder to roughen the surface for better adhesion. Ensure the surface is dry before applying the epoxy.

2. Mixing the Epoxy:
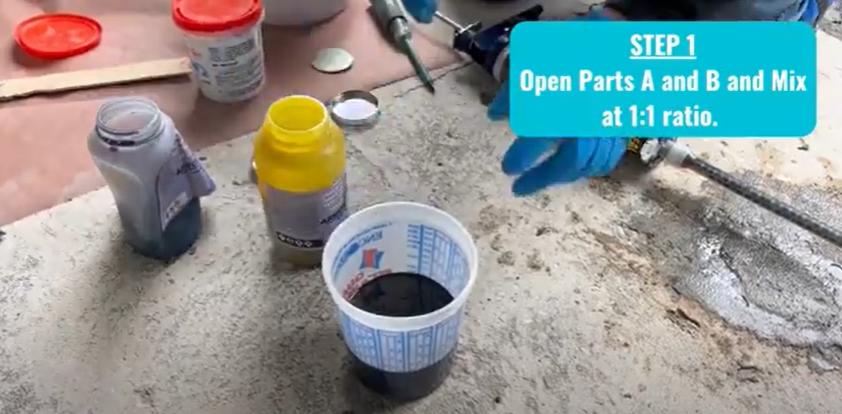
The kit usually includes two components: resin and hardener. Follow the instructions for the correct ratio (often 1:1). Mix thoroughly for 3-5 minutes, ensuring a uniform blend.
3. Application:
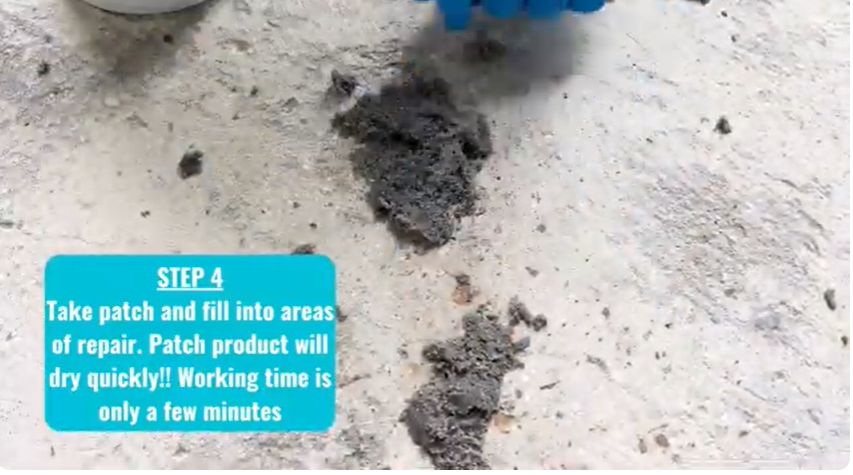
Using a trowel or putty knife, apply the epoxy mixture to the damaged area, filling in cracks or holes. Spread it evenly and press firmly into the surface.

4. Smoothing and Shaping:
Smooth the surface using the trowel, ensuring the epoxy is level with the surrounding area. You can shape it to match the surface texture.
5. Curing:
Allow the epoxy to cure. The fast-set formula usually hardens within 30 minutes to a few hours, but full curing may take longer. Avoid traffic or stress on the area until fully cured.
Maintenance Fast Patch Epoxy Kit
To maintain your Fast Set Epoxy Patch Kit, follow these steps:
- Clean Tools Immediately: After use, clean your trowel, putty knife, and mixing container with a solvent like acetone or rubbing alcohol before the epoxy hardens.
- Seal the Components: Tightly close the resin and hardener containers to prevent air exposure, which can lead to premature hardening.
- Store Properly: Keep the kit in a cool, dry place, away from direct sunlight or heat sources to extend its shelf life.
- Check Expiry: Regularly inspect the kit for expiration dates to ensure optimal performance.
Tips for Best Results
To achieve the best results when using the Fast Set Epoxy Patch Kit, consider the following tips:
- Temperature Considerations: Make sure that the ambient temperature is between 50°F and 90°F (10°C and 32°C) during application. Extreme temperatures can affect curing time and adhesion.
- Test Small Areas First: If you're unsure about the color or finish, test the epoxy on a small, inconspicuous area first. This will help you gauge the appearance and ensure compatibility with the existing surface.
- Multiple Layers: For deeper cracks or holes, consider applying the epoxy in layers. Allow each layer to cure partially before adding the next, making better adhesion and stability.
- Finishing Touches: After the epoxy has fully cured, you can sand the surface lightly if needed for a smoother finish or to blend it better with the surrounding area.
By following these guidelines, you can effectively use the ArmorPoxy Fast Set Epoxy Patch Kit to repair your concrete surfaces, get a durable and long-lasting finish.

