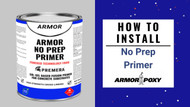
ArmorPoxy No Prep Primer is a revolutionary single-component, sol-gel-based fusion primer designed for seamless application directly onto surfaces. Once applied with a garden-type sprayer, simply wait 10-15 minutes fo the No Prep to get 'tacky' and then apply your coating.
ArmorPoxy's No Prep Primer is designed for fast, efficient application on various surfaces without extensive preparation. Here's how to install it:
- Surface Preparation: While the No Prep Primer reduces the need for surface preparation, it’s essential to clean the surface of any loose debris, dirt, or oils. A quick wipe or light cleaning will ensure better adhesion.
- Application Tools: Use a high-quality roller, brush, or spray equipment to apply the primer. For large areas, a sprayer may offer faster coverage, while a roller is ideal for smaller sections.
- Mixing the Primer: Stir the primer thoroughly before application. Ensure the components are well-blended to maintain even consistency.
- Application: Begin by applying a thin, even coat of the primer across the entire surface. Avoid applying too thick a layer, as this may lead to an extended curing time. Make sure smooth, uniform coverage to maximize adhesion for your topcoat or finish.
- Drying Time: Allow the primer to dry fully before applying any topcoat or additional layers. Depending on environmental factors like temperature and humidity, drying times may vary. Generally, it takes around 2 to 4 hours to be ready for the next step.
- Topcoat Application: Once dry, apply your chosen topcoat, whether it’s an epoxy, urethane, or paint. The No Prep Primer enhances adhesion, ensuring a long-lasting, durable finish.
This easy-to-install primer saves time while providing excellent surface bonding and durability.

