

You can create endless pattern and finishes with Armor Tallic Metallic Kit. This metallic kit provides exceptional coverage on surface regardless of different surface porosity, roughness or floor texture. The Armor Tallic Metallic Epoxy Kit by Armorpoxy is designed to transform ordinary surface like concrete to stunning high gloss surface with luxurious finish. It is ideal for both residential and commercial spaces. This kit offers a unique blend of durability and visual appeal. Whether it is garage, basement, office or any other surface, the ArmorTallic system provide an easy to apply solution that delivers professional grade results with modern look.
In this guide, we will explore step by step installation process of this Metallic kit.
Step by Step Process
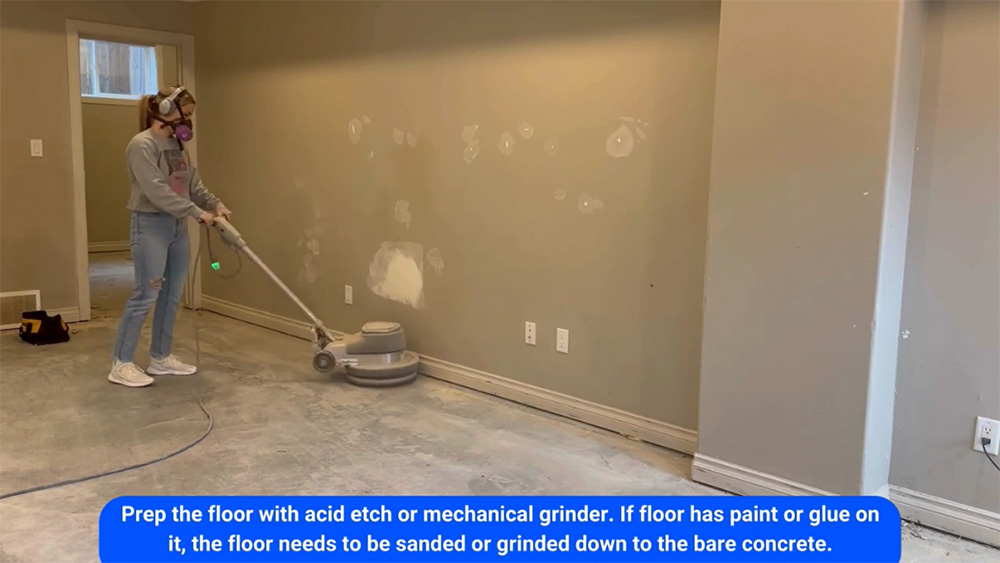
1: Prep the Surface
a.Clean the Surface: Begin by thoroughly cleaning the concrete surface. Remove all dust, dirt, grease, and oil using a concrete degreaser. Power washing might be necessary for heavily soiled areas.
b.Surface Grinding: Use a concrete grinder or shot blaster to roughen the surface. This step ensures the epoxy adheres properly by creating a porous surface.
c.Repair Cracks and Imperfections: Fill any cracks or holes with a suitable concrete patching compound. Allow it to dry completely, and then smooth the patched areas.
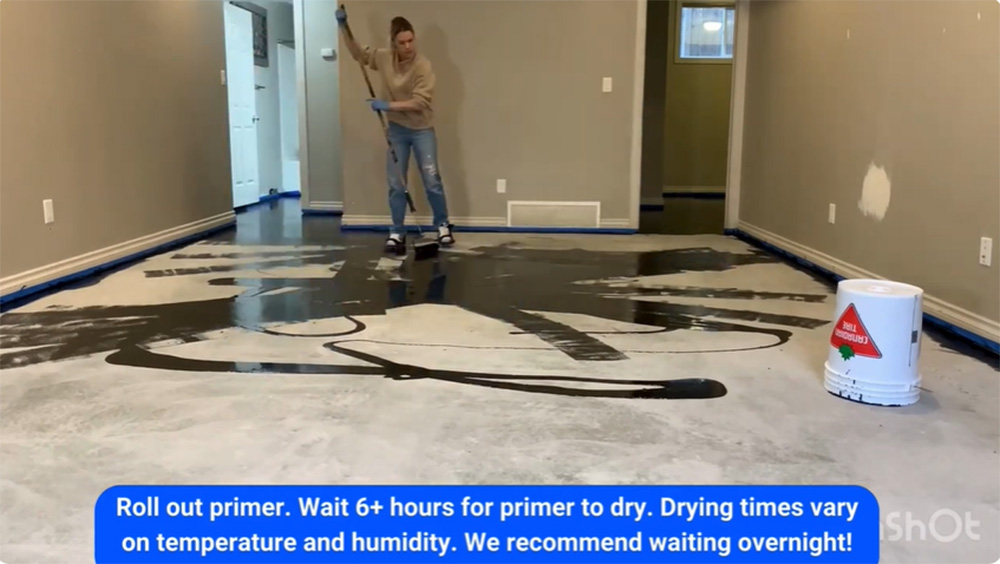
2: Prime the Surface
a.Mix the Primer: Follow the manufacturer’s instructions to mix the epoxy primer. Mixing typically involves combining two components (Part A and Part B).
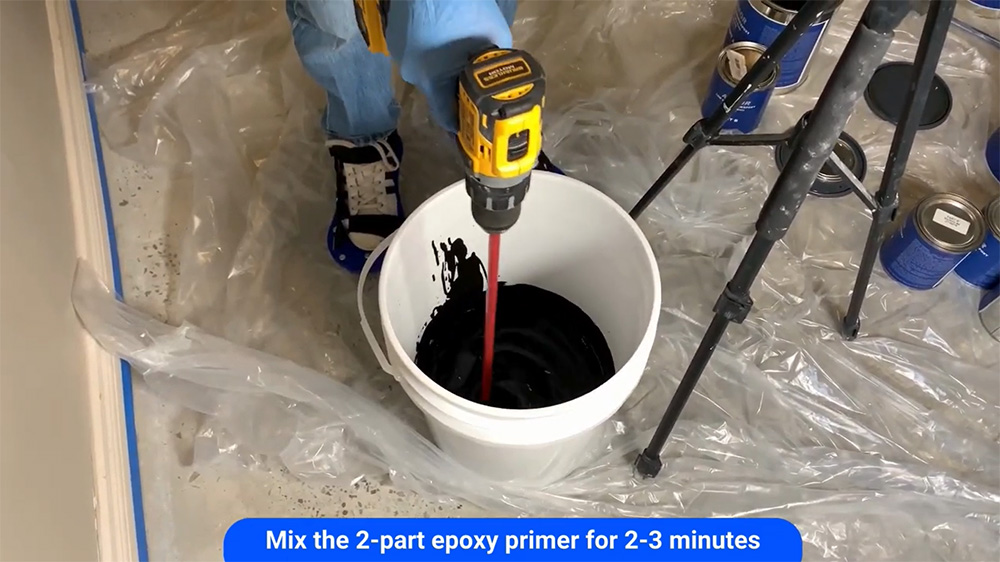
b.Apply the Primer: Use a roller or brush to apply the primer evenly across the floor. Make sure to cover the entire surface to create a consistent base for the metallic epoxy.
c. Allow to Cure: Let the primer cure according to the product's guidelines. This usually takes several hours but can vary based on temperature and humidity.
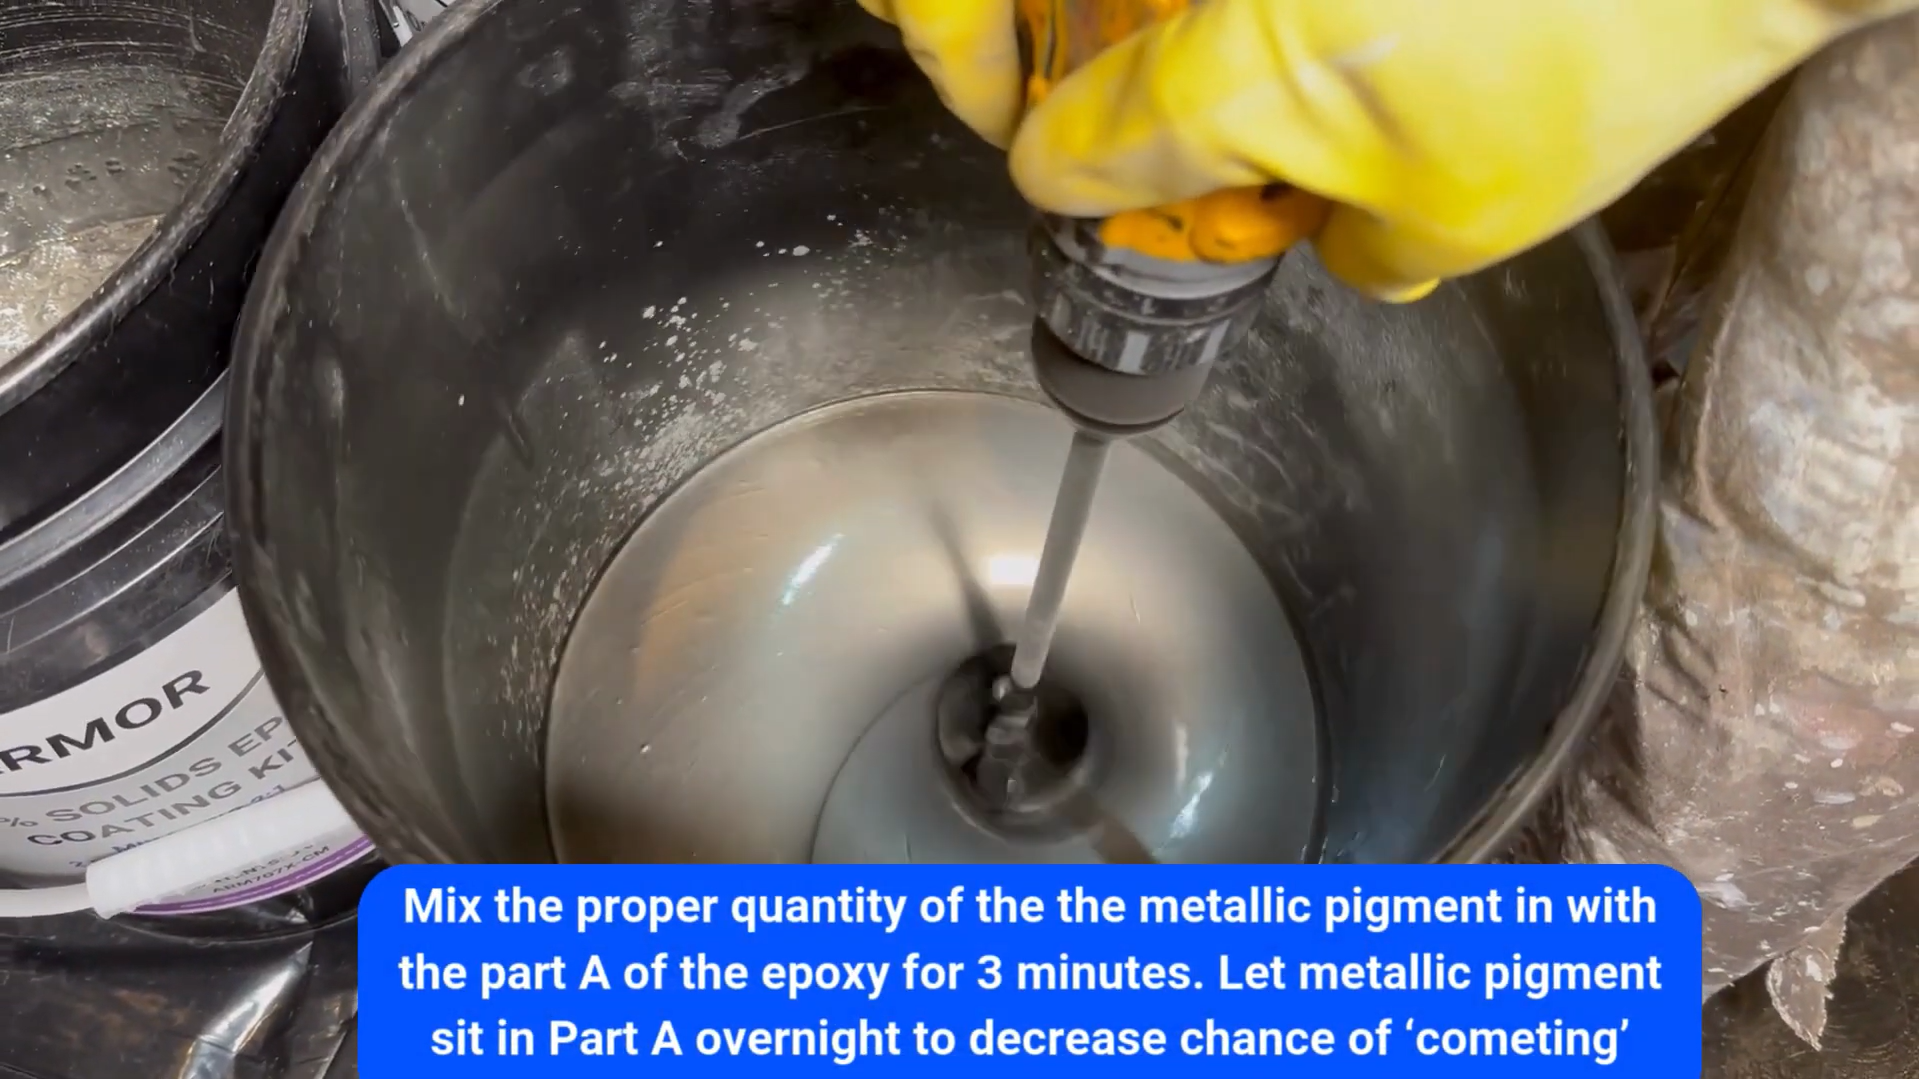
3: Mixing the Metallic Epoxy
a.Prepare the Epoxy: Mix the ArmorTallic Metallic Epoxy by combining the resin (Part A) with the hardener (Part B). Mix thoroughly to ensure even color and consistency.
b.Add Metallic Pigments: After mixing, add the metallic pigments to the epoxy. Mix until the pigments are fully incorporated, creating the desired metallic effect.
4: Applying the Metallic Epoxy
a.Pour the Epoxy: Pour the mixed epoxy onto the floor in a line or ribbon pattern.
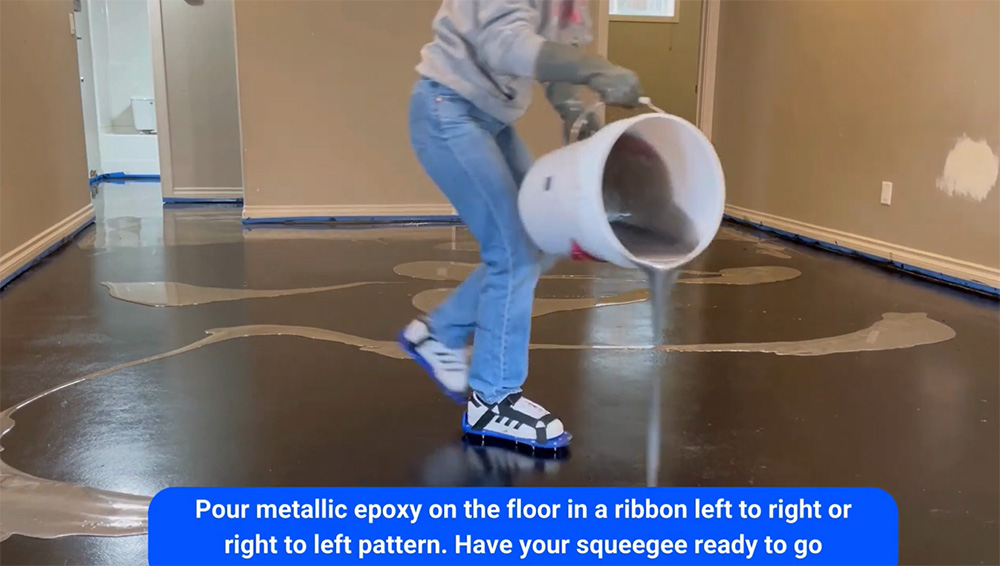
b.Spread the Epoxy: Use a squeegee or notched trowel to spread the epoxy evenly across the floor. Work in sections to ensure even coverage and avoid the epoxy setting before it’s fully spread.
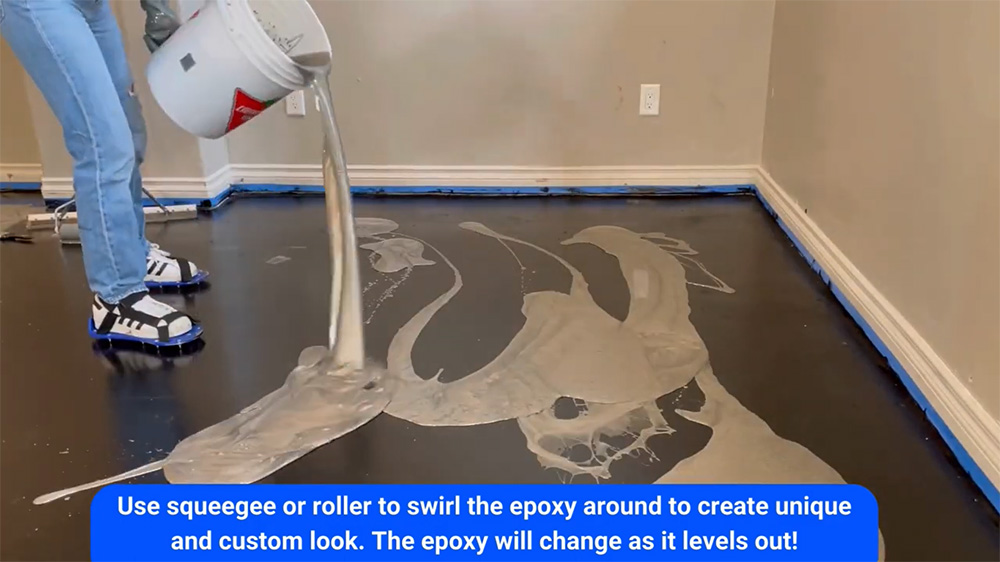
c.Create Designs: To achieve the desired metallic effect, use a roller, brush, or other tools to create swirls, waves, or other patterns in the epoxy. The movement of the epoxy will naturally create a unique, flowing design
d.Use of Alcohol: You can use alcohol while the floor is still wet to create or make the metallic coating customized.
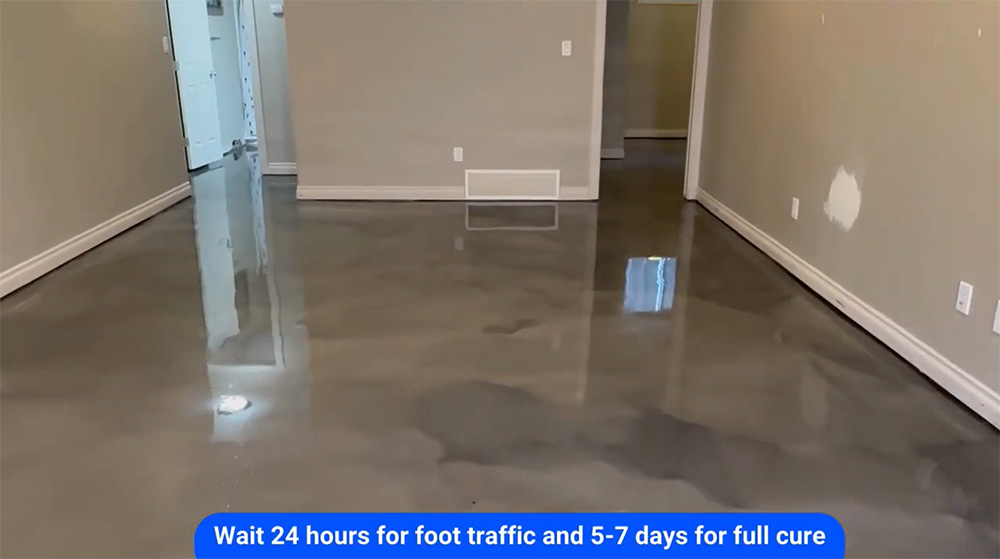
5: Allow to Cure
a.Curing Time: Allow the epoxy to cure according to the product’s instructions. This typically involves leaving the floor undisturbed for 24-48 hours.b.Avoid Foot Traffic: During the curing process, keep the area free from foot traffic, dust, and debris to ensure a smooth, flawless finish.
6: Apply the Topcoat (Optional)
a.Mix the Topcoat: If a topcoat is desired for additional protection and gloss, mix it according to the manufacturer’s instructions. This topcoat is non-skid additive military grade topcoat.
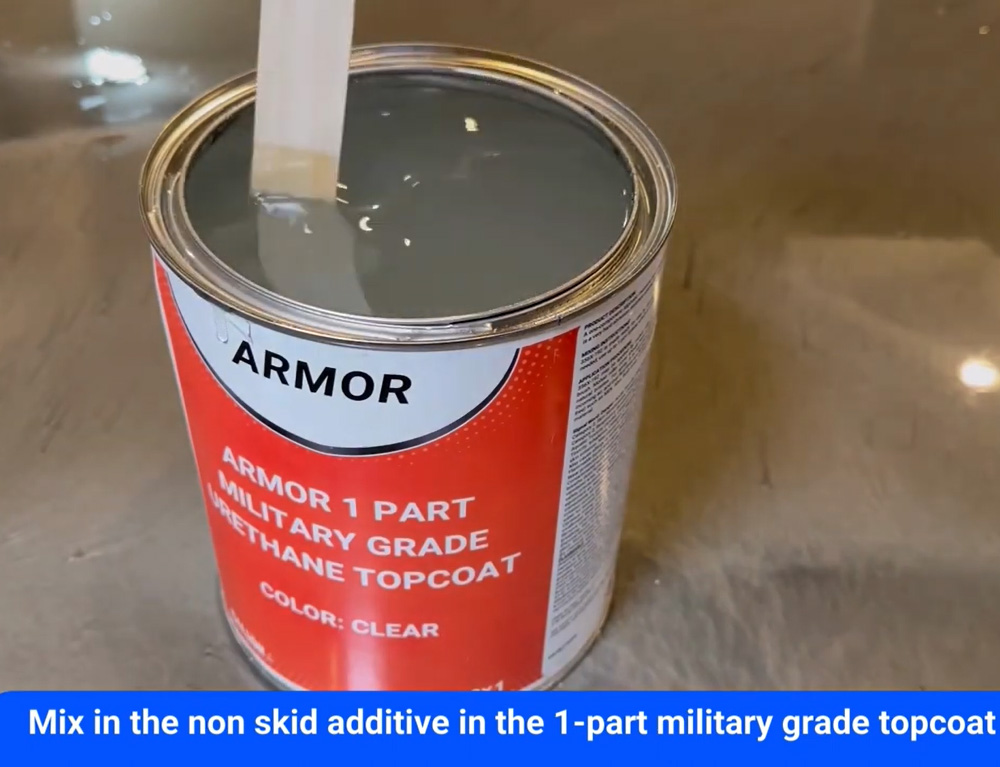
b.Apply the Topcoat: Use a roller or brush to apply the topcoat evenly over the cured metallic epoxy. This step will add extra durability and enhance the floor's shine.
c.Final Cure: Allow the topcoat to cure for the recommended time before walking on the floor or placing any items on it.
7: Final Look
The ArmorTallic system provides an easy-to-apply solution that delivers professional-grade results, ensuring a seamless, modern look that’s built to last. Book your ArmorTallic Kit from ArmorPoxy now and have glossy floor with easy installation.