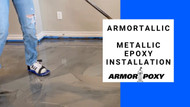
ArmorPoxy's ArmorTallic metallic epoxy system is a 3-layer professional-grade epoxy coating system. The kit comes with everything you need to install it yourself, and no special skills are required! Watch our installation video for tips and tricks on installing your metallic floor today!
This versatile kit is perfect for transforming dull surfaces into stunning, high-gloss floors with a beautiful metallic finish. Whether you’re a DIY enthusiast or a seasoned professional, our step-by-step instructions will help you achieve a flawless installation.
Preparation: Start by preparing your workspace. Ensure the surface is clean, dry, and free of debris. Remove any old coatings or sealants, and repair any cracks or imperfections.
Mixing: Next, mix the metallic epoxy according to the manufacturer’s instructions. Make sure to blend the resin and hardener thoroughly to ensure a uniform finish. Add the metallic pigments to achieve your desired color and effect.
Application: Pour the mixed epoxy onto the floor in small sections, using a notched trowel or roller for even distribution. For a unique look, experiment with different pouring techniques to create swirls and patterns.
Curing: Allow the epoxy to cure according to the product guidelines. This typically takes 24-72 hours, depending on temperature and humidity.
Finishing Touches: Once cured, apply a topcoat for added protection and shine. With proper care, your metallic epoxy floor will not only look stunning but also stand the test of time!

